Monday, May 12, 2014

Color Love--The BOM Quilts

Okay, so a while back I showed off my upcoming Color Love fabric collection from Marcus Fabrics with a sneak peek at an applique block. Since we leave tomorrow for Spring Quilt Market, I thought it might be a good time to show a few images of the Color Love BOM quilts. The reason I say "quilts", plural, is because there are two versions of the same quilt: an applique version and a pieced version. The quilts finish at 87" x 93" and the program is designed as a five-part BOM, with "flex" options to make it longer if desired.
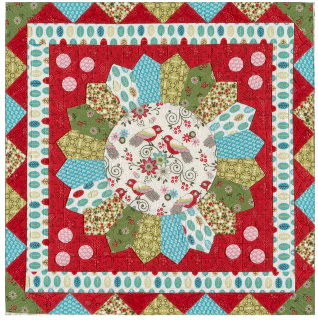
Here is my EQ rendering of the applique version.  See the eight cute applique blocks surrounding the center star?  They are made up of simple shapes, and to make things even easier, we are offering the blocks as laser cut, pre-fused blocks.

NEW Color Love Applique Quilt

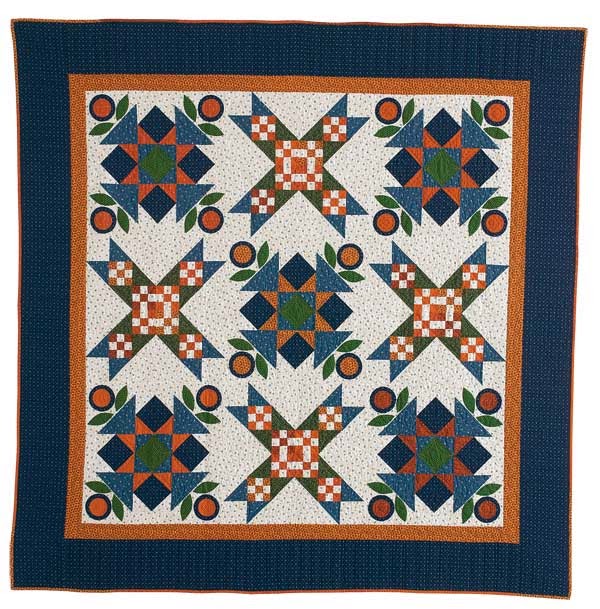
And here is the pieced version for those who do not do the "A" word.
NEW Color Love Pieced Quilt

And here is a photo of the actual applique Color Love quilt spread out on my living room floor. I had A LOT of help with this quilt from some great ladies in Albuquerque,NM. Thank you Amanda Ruden!  The pieced quilt was made by Sandy Kent who lives in Texas. I'd show you photos of it too, but it is all folded and packed in a suitcase, ready to go to Pittsburg tomorrow.
CL applique

Isn't the quilting perfect? Elizabeth Anne Dawson of Albuquerque, NM worked her longarm magic on the quilt.
CL detailBlock close up
Ask for Color Love at your local quilt shop. The program is slated to begin September 2014. You can find additional information on the Marcus Fabrics website.

Sunday, March 2, 2014

Color Love is Here

Color Love--that's the name of my newest fabric collection with Marcus Fabrics.  Here's my sample yardage all laid out on my cutting table, ready to be put to work. Oh, my pretties!

color-love-fabric-photo


So there is already a plan for Color Love--a block-of-the-month quilt also called Color Love. It is a five part BOM with an applique' option, slated to begin shipping June 2014. Ask for it at your local There are two version of the same quilt--one pieced and one with some applique. To makes things even more fun, we have ordered up a bunch of the applique' blocks from a company that does laser cutting. Yesterday I worked on the seven applique' blocks.  It was so easy to just peel and fuse the shapes in place and then buttonhole stitch around the patches. Now, mind you, I am not the most proficient person when it comes to buttonhole stitching, but I did manage to get the job done. Here's a block and some close ups.photo 1
Color Love Close

photo 2

Monday, November 18, 2013

Clara's Pride

It's always so thrilling to see something I made in print! And on the cover! Can you see it peeking out from under the quilt on the far right?

Here is Clara's Pride which is in the Jan/Feb 2014 edition of McCall's Quilting.  The blocks are large so they go together relatively quickly and there are only nine of them. The finished quilt is 70 1/2" square.

Pieces from three Marcus Fabric collections are in the quilt.  We have kits with the fabrics shown for $94 on our website, nancyrinkdesigns.com.


Sunday, October 13, 2013

New Book


Oliver and I have been working on a new book.  The tentative title is El Camino Real: Quilts Inspired by Early California History and is due out Spring 2014 from Kansas City Star.

There have been moments when I've asked my husband, "Are we crazy? I think we forgot how much work this is!"  Of course that was when I still had three unfinished quilts with two weeks left until the photo shoot.

Today I feel relatively relaxed.  The quilts are done, except for one that still needs the binding turned and sewn.  But there will be some TV watching tonight and some more tomorrow, so that binding should be done in time for the photo shoot on Tuesday, which is two days from now.

Aaron Leimkeuhler, the photographer, is meeting us at La Purisima Mission State Park in Lompoc, CA where he will work his magic.  This is my first time to be a present during a quilt photo shoot, so I am excited to see how it all works.

So after Tuesday, I'll have a few days to . . . hmmmm  ....
....clean off my desk
....clean my studio
....put some labels on the quilts before shipping them back to KC where Aaron will do the flat shots and color correcting in his studio
....prepare for my Schoolhouse presentation at Fall Market
....package and ship some orders
....buy some Smith's cookies and Dewars chews for my friend Mary and the Marcus girls.


by the way, if you have never had Dewar's chews you are definitely missing out on one of life's better taste sensations. Dewar's is a family owned ice cream and candy shop that has been around forever in Bakersfield. Here is a link to their site: Dewars

and here is a video where you can see how they make the DELISH peanut butter chews: Chew Video
(Seeing how things are made fascinates me!)


Sunday, September 29, 2013

El Camino Real BOM--Almost Ready!

Here are most of the fabrics in my new line, El Camino Real. This collection is a colorful grouping inspired by California's rich history, a blend of Spanish, Mexican, and Native American traditions. Bright color and intricate motifs echo the decorative tile work  and architecture of the region,

Marcus Fabrics is offering a block-of-the-month program that runs January 2014 through December 2014. I've designed the quilt and written the patterns. Today, I put the finishing touches on the patterns, and read through them one more time just to make sure I haven't missed anything. Here is what the pattern set looks like.
The El Camino Real BOM program is a 12-month program. But, that doesn't necessarily mean there are twelve blocks!  El Camino has twelve pieced blocks set alternately with a block that combines piecing and applique'. Each block is named after one of the California missions along the El Camino Real (Spanish for "The King's Highway").

Here's a larger photo of the quilt. The finished size is 94 1/2" x 114 1/2".  Perfect for your bed!


Stay tuned.  Oliver and I are working on a book called El Camino Real: Quilts Inspired by Early California History, due out Spring 2014 with Kansas City Star.  And guess what--the fabric will be making an appearance there too.

Monday, July 1, 2013

Tweet Friends Post #4--How to Make Skinny Legs

Technique: How to make the skinny bird legs in
 Block #4: Feathered Friends

1. Cut a double layer of freezer paper that is approximately 1" x 8".

2. Take a small chunk of fabric. I used a piece that was about 6" x 10".  Because the bird legs look like sticks, we can cut them on the straight of grain.  When I want narrow stems that will curve, I use this same technique, but cut on the bias.  Press the freezer paper strip shiny side down to the wrong side of the fabric. Leave approximately a 1/4" seam allowance. Starch the seam allowance and press it over the freezer paper.  Let cool.

3. Peel off the freezer paper and cut the strip so that it is 1/2" wide from the fold to the cut edge.


4. Reposition the freezer paper, aligning its edge with the raw edge of the folded over seam allowance. Press to the fabric.  Paint the seam allowance with starch and press it over the freezer paper. Allow to cool, but DO NOT remove the freezer paper yet.


 5. Trim the seam allowance to approximately 1/8" wide. Now, remove the freezer paper.


6.  Here is a skinny strip ready to be cut into skinny leg pieces.


Monday, June 24, 2013

Tweet Friends Quilt Along Post #3


Technique: How to accurately piece the triangle 
border on the Dresden Friends block 

Here is what you need:
Cut triangles according pattern instructions
Easy Angle Ruler by Wrights

Here is what you do:

Position the ruler on top of a triangle, aligning the edges of the ruler with the edges of the fabric. Trim off the point.  Flip the fabric over and trim off the other point.  The red triangle shown has had its points trimmed.


 To sew, position one triangle on top of another so that the trimmed end of the triangle on tip kisses the edge of the triangle on bottom.  Pin triangles if desired.
 
Start stitching at the "kiss" point, and continue stitching off the end. The black line indicates the stitching line. Continue adding triangles in the manner until you have enough to make a border.