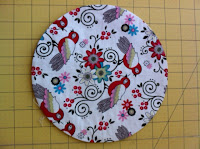
Block One
Dresden Friends
Technique: How to make the Dresden wedges
Fabric Strips, cut 4 1/4" x 11"
Background Fabric Square, cut 17"
Easy Dresden Ruler by Wrights
Prairie Pointer Pressing Tool
Prairie Pointer Pressing Tool
Rotary Cutter
What to Do:
Align the 6 1/2" line on the Easy Dresden ruler with the top edge of one of the fabric strips. (You may notice that I am using a fabric from my upcoming El Camino Real fabric line:) Cut on both sides of the ruler. A revolving mat comes in handy for moving your fabric around so that you are not contorting yourself into any weird and possibly dangerous positions as you make the first cut.
Continue flipping and cutting until you have four wedges. Repeat this process on the other fabric strips.
Now you are ready to sew. Here are my four Green Flower wedges. Fold them in half, right sides together.
Finger press seam open.
Slide the Prairie Pointer pressing tool into the point of the wedge. Align the seam line with the center line on the tool. Press. Watch out, though. Because the tool is metal, it gets hot. Slide out tool.
Repeat the process on all 20 wedges.
Sew wedges in pairs, pressing seams open.
Make four identical wedge sets.
Join sets to create the Dresden.
Position the Dresden on the background square. Baste. Applique in place by hand using a neutral thread or by machine using monofilament thread and a small zig zag stitch.
Stay tuned for a subsequent post on the Freezer Paper and Starch applique techniques I use to create circles.


No comments:
Post a Comment