Technique: How to make Applique' Circles
Tweet Friends has appliqued circles in several blocks and borders. Believe it or not, I actually enjoy making circles to applique.
Here is what you need:
Freezer Paper
Freezer Paper
1" circle punch (in the scrap booking section of Michael's/Joanne's/Hobby Lobby, etc)
Highlighter or permanent marker
Stencil brush or small paint brush
Starch
Awl or something pointy
Mini- Iron
One Pin
Here is what you do:
1. Press together two pieces of freezer paper. Make sure both are paper side up.
2. Scribble all over the freezer paper with the highlighter or a permanent marker. It is hard to see the marker in my photos, but trust me this is a crucial step because this is how to tell the "right/paper" side of your templates from the "wrong/shiny" side.
3. Punch out the number of circles you need using the 1" hole punch. (note: these are circles I am making for another project). Isn't that easy? No tracing, no cutting! The punches may seem a bit pricey, but, oh the time they save you. By the way, if I design an applique pattern that calls for circles, the circle sizes are going to correspond with circle hole punch sizes.
4. Press the circles, shiny side down, to the wrong side of the fabric.
5. Cut out the circles, leaving a scant 1/4" seam allowance.
6. Move to your pressing surface. Anchor the circle with a single straight pin. Paint the seam allowance with starch.
7. Use something pointy (a seam ripper works when all of your special applique tools are packed up for a workshop you are headed to) to pull the seam allowance over the template while you press it in place using the mini-iron. Pivot the circle and pull and iron, pivot, pull, iron, etc. until . . .
8. The circle is finished.
9. Give it a press from the right side, inspecting it for "pokies". If you find pokies, turn the circle back over, wet the offending area with starch, and redo.
Okay, but what about the circle for the center of the Dresden Friends block?
For it, use the same techniques. First though, you will have to trace the template. Notice I have creased the freezer paper vertically and horizontally. This helps to position the circle correctly in the center of the wedge circle.
Press the freezer paper template to the wrong side of the fabric. Starch, turn, and press the seam allowance.

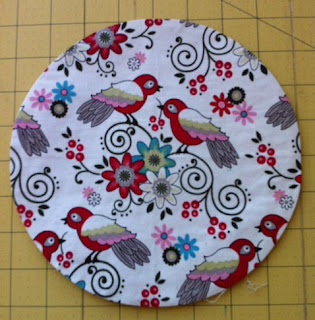
And here is the right side with a bird motif positioned in the center.


1 comment:
What a fantastic tutorial. Thank you for sharing your methods!!
Post a Comment